Search the Community
Showing results for tags 'easy guide'.
Found 1 result
-
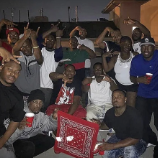
Yooo wagwan my people, lots of people been asking me "YO FAM HOW YOU EDIT YOUR SCREENSHOT LIKE THAT?" "HOW COME YOUR SO QUICK WITH YOUR SCREENSHOTS" Well that's because I use the /blindfold method instead of a chatlog parser. (YUCK). However some people get confused with the blindfold method when it comes to "blending" your text into the screen. None the less, I'm going to share a quick guide with you guys on how to edit screenshots using the blindfold method WITHOUT doing any type of blending to your text. (Thank god for the blindfold tool). This method is nothing new, I learned it a while back during my time on LSRP. Hope you guys enjoy. NOTE: THIS EDITING STYLE IS FOR PEOPLE WHO HAVE GTA ON STEAM ONLY!!! REQUIREMENTS: Photoshop Blindfold tool Photoshop Download: https://drive.google.com/file/d/1b1jSya3myVjWS4hQiNhQMdUmtfwCmv1R/view Blindfold tool download: https://www.mediafire.com/file/orxdzvfsc0qpuf6/Blindfold.atn/file Downloading & Installing Photoshop and blindfold tool Step 1.) Download Photoshop. Step 2.) Download the blindfold tool. Step 3.) Drag the blindfold tool into Photoshop and it should automatically open. Step 4.) Once PS is open, click Windows > Actions then your blindfold tools should be visible. EXAMPLE: https://gyazo.com/a0e78b89bd4e5efecd640081361214e9 Taking your screenshot in game Step 5.) Take a BLANK screenshot in game, be sure to use the F8 button for this screenshot. Step 6.) Now for the text type /blindfold and take a screenshot, be sure to use the F12 button for your text. Editing your screenshot in photoshop Step 7.) Open Photoshop. Step 8.) While in photoshop open your blank screenshot. This PC > Local Disk > RageMP > screenshots > play_gta_world_22005 Step 9.) While in photoshop with your SS open, press Ctrl + N to open a new page. Set the width to 800 and the height to 600 pixels. Step 10.) Go back to your original SS in your first tab, click and drag it over to your second tab. EXAMPLE: https://streamable.com/tql1o2 Editing your text in photoshop Step 11.) Now it's time to include the text you want in the screenshot. Press Ctrl + O, Local Disk > Program Files (x86) > Steam > Userdata > 397763335 > 760 > remote > 271590 > screenshots Step 12.) Using the rectangular marquee tool, you will select the text you want to include in your screenshot. Step 13.) Once you have selected the text you want to include in your SS: Ctrl + C then Ctrl + N. Press OK without touching the dimensions. Step 14.) A new page will open to fit your text only, once it opens. Press Ctrl + V to paste the text there. EXAMPLE: https://streamable.com/dhmilb Step 15.) Once your text is pasted on the tab, be sure to click on it once to ensure that it is selected. Once selected, you will click "Blindfold" on your actions menu/blindfold tool. Step 16.) The black background should automatically disappear and your text should be ready to go. EXAMPLE: https://streamable.com/w03o78 Adding the black background to your text Step 17.) After removing the black background click & drag the text into the blank SS tab and position it the way you want. Step 18.) Once you positioned your text, click on the rectangle tool and ensure your colors are set to black. Step 19.) Once done, still using the rectangle tool you will add your own black background to your text. EXAMPLE: https://streamable.com/9y2kr0 AND YOU ARE FINISHED! Now you know how to edit screenshots without using a damn chatlog parser. Once you get used to this type of editing style, screenshots take no longer than 5 minutes to edit. Here's a video of me covering Step 7 all the way to Step 19. https://streamable.com/w0itng FINAL PRODUCT: