Search the Community
Showing results for tags 'menyoo'.
Found 11 results
-
This thread is a place for everyone to showcase their GTA:W character menyoo's.
-
High-Quality Menyoo Guide 2023 This guide is purely to elaborate on more modern ways to step up your Menyoo game. This will not be going over the initial set up as honey./jessica's guide explains that perfectly and next to nothing has changed with that. Adding Mods, Animations, & Props You're going to want to add custom hairs, clothing, animations, props, etc. into your game. Typically you can find things that suit aesthetically fit your character. Make sure you are using OpenIV in edit mode for everything involved with mods. You'll want to follow the mpclothes guide located in the mods & menyoo club discord. GTAW Props: This file is made by the lovely @Tiddy. This file is going to be required into your GTA V singe player if you want any property XML's to work properly. Otherwise you're going to run into missing furniture items, walls, flooring, etc. Just follow Tiddy's guide on installation. You'll notice in Tiddy's thread that there is three files to help the dlc increased size. The files are going to be gameconfig, heapadjuster, and packfile limit adjuster each download link should be listed out on Tiddy's thread. These files are REQUIRED in your GTA V game because more than likely you'd crash 9/10 times if not. The gamconfig is going to follow this installation path GTA V > mods > update > update.rpf > common > data. The other two files heapadjuster and packfile limit adjuster will just be placed into your main GTA V directory. (You don't need to be in OpenIV for this step). GTAW Hairs: The files aren't going to completely have a lot of the new hairs that GTAW offers now in game, but it's still a really good amount of custom hairs. Once you have downloaded the file and extracted it, you'll need to place 3 separate folders into the following directory within OpenIV. The installation path is GTA V > mods > update > x64 > dlcpacks. It should look like this: Once you have done that, we need to locate the dlclist.xml. This should be in the following path GTA V > mods > update > update.rpf > common > data When you have gotten there, double click the dlclist.xml to bring it up to be edited. It's going to look a little crazy, but it's a simple copy and paste. You'll need to copy and paste the following: <Item>dlcpacks:/gtahairs/</Item> <Item>dlcpacks:/gtawhairfemale/</Item> <Item>dlcpacks:/gtawhairmale/</Item> Not that you have pasted those into your dlclist.xml, all you have to do is save and you can exit! Should look like this: Clothing: There is a mass wide variety of clothing all over for GTA V ranging from free items to even people with paid items. For the purpose of showing how to install a piece of clothing, I'm just going to direct you to this following website: https://www.gta5-mods.com/player. This website has many free clothing, hair, accessories etc. You're going to want to make sure that you are downloading MP Female of MP male, though. They will not work otherwise. For an example I'm going to be downloading the following shoe mod: https://www.gta5-mods.com/player/mp-female-cute-sneaks Once the file is downloaded, we're going to extract it. The file should look like this once opened: We're going to need to locate over to our mpclothes folder that should be in the mods folder. Path should be the following: GTA V > mods > update > x64 > dlcpacks > mpclothes > dlc1.rpf > x64 > models > cdimages > mpclothes_female.rpf > mp_f_freemode_01_mp_f_clothes_01 You're going to directly drag and drop ALL of those files into that mpclothes folder. Boom, then the shoes should be in your game! One thing to specifically notate about any clothing/hair mods is that you're going to want to make sure they aren't overlapping numbers when you drop them into the mpclothes folder. It will continuously just replace the existing file if you don't correct the names from overlapping. Example: Let's say I download the file above mentioned for the shoes. The file is currently named feet_025_u.ydd. You're going to want to change the last three numbers to be more suiting for your folder. So, I could simply just increase it to feet_026_u.ydd if I don't already have a file named that. Then, you'd want to proceed to rename the rest of the files that came with the shoes in order to make sure the different colors work. Animations: The old way to do Menyoo consisted of you compiling a bunch of animations together until something looked half way decent, very similar to how the custom animation script works in game. Luckily, now many very talented people have made animations for us just to download and use directly into Menyoo! Firstly, we're going to need to install the Custom Animations add on. Which can be found here, https://www.gta5-mods.com/misc/custom-animations-add-on-customanims. Once the folder is downloaded you are going to follow basically the same steps as mpclothes, gtawprops, and gtawhairs. The installation path will be GTA V > mods > update > x64 > dlcpacks Then, you need to update your dlclist.xml. This should be in the following path GTA V > mods > update > update.rpf > common > data When you have gotten there, double click the dlclist.xml to bring it up to be edited. You'll need to copy and paste the following: <Item>dlcpacks:/customanims/</Item> Not that you have pasted those into your dlclist.xml, all you have to do is save and you can exit! Should look like this: Now, let's download an animation together, because there is one more step you need to do other than simply drag and dropping to make it work. Personally, I am in LOVE with smo's animations. Their discord strugglesville is going to have a lot of nice free ones as well. Now, that you are in the discord, you should be able to find a channel that says da freebies. I'm going to download the Female Pose Pack #11. You're going to extract the file and open up the folder that says Female Pose Pack #11. All you have to do is move the YCD file's into your custom anims folder. Don't move the PNG file it's just there as a reference to what the animations look like. The installation path is GTA V > mods > update > x64 > dlcpacks >customanims > dlc.rpf > x64 > anim > ingame > [email protected] Should look like this: (bare with all my animations, I have a lot.) Now, that the animations are in the customanims folder, we need to do a final step. This does not need to be done in OpenIV. You're going to pull up the "READ ME!!!" text document from the Female Pose Pack #11 download. Then you will go to your normal Grand Theft Auto V folder and go to menyoo stuff, then FavouriteAnims The installation path for me is as follows: Windows (C:) > Program Files (x86) > Steam > steamapps > common > Grand Theft Auto V > menyoostuff > FavouriteAnims Double click the FavouriteAnims XML file and you're going to copy over from the "READ ME!!!" text document: <Anim dict="anim@female_model_20" name="f_model_20_clip" /> <Anim dict="anim@female_model_21" name="f_model_21_clip" /> <Anim dict="anim@female_model_22" name="f_model_22_clip" /> <Anim dict="anim@female_model_23" name="f_model_23_clip" /> <Anim dict="anim@female_selfie_07" name="f_selfie_07_clip" /> <Anim dict="anim@female_selfie_08" name="f_selfie_08_clip" /> Copy this into your FavouriteAnims document, then remember to save it before exiting. Now that animation should be in the Menyoo menu under favorites! Props: This is the way I do my props. There is a mod that is called "addonprops", but quite honestly it confuses the hell out of me and I find this way much easier! I'm going to give you a free phone mod that does the trick. You can find the phone here: https://www.gta5-mods.com/misc/apple-iphone-14-pro-max Once that is downloaded, you're going to need to extract it. I'm going to use the phone with the Flash-Light ON option, so open up that folder. You're going to notice the file is named p_amb_coffeecup_01.ydr. Go over to your GTA V > mods folder and go into the search bar in the top right. Paste "p_amb_coffeecup_01.ydr" into the search bar and hit enter. It's going to say No Items match your search, click the option below it like so: Now, it's going to search every single archive for that name. You're going to need to replace the file where it's located. DO NOT replace any file unless it's in the mods folder, otherwise you're going to completely ruin your game. Double click that option and make sure it redirects you to a mods folder, drag and drop the file from your phone download folder, and then boom it's done! Should be in your game under that exact name. Looks like so: That's pretty much everything on a set up of how to get the basics to a great photo in game! Creators: These are just some really great creators that I've personally come across. There are so many more as well, but these are my favorites. These range anywhere from clothing. hair, animations, props, etc. Some of these people are even in game companies! Strugglesville Sugar Vault Haute Classy Mods kaykaymods Vynty Bxtchy Photo Time I created this video with no voice over, just going to list all my steps below! You're going to see me click around a lot, because I have fog brain and move all over, but I'll put the direct paths below for each step. Video: https://streamable.com/84923g Now that all of the set up is done, we're going to go into the actual GTA V game. It should be notated that for best results of your character/property that you should download the property XML file and character XML file which can be found on the UCP. I'll be using my character Lia for example today. - As soon as GTA V has loaded up, I am going into menyoo with F8, and I'm going to load in my characters house XML. F8 > Object Spooner > Managed Saved Files > lia house > load placements (All newly downloaded property XML's will be the property name, I just renamed mine to that). It's going to load in our GTAW Mapped house and teleport us right to the entry! - Now that I have my house in place, I just kind of find a spot that I want to set up for the picture. I decided on something close to the cat tree with Maxwell. Then, I need to load in my character. I already have my character set up from previous menyoos and her XML. F8 > Object Spooner > Spawn Entity Into World > Ped > Search > Freemode Female/Freemode Male Before, I completely dress up the ped, I actually just go ahead and place them near the area that I want the picture at. So, I'm going to attach the ped to my Franklin character and just place the ped near the cat tree. Object Spooner > Manage Entity Database > Freemode Female > Attachment Options > Attach To Something > Self Then, I'm going to apply Lia's clothing/xml next to the Freemode Female ped. Typically, if this is your first time going into menyoo, your XML file is going to be basically nothing except the face, makeup, and maybe hair. I've already done a lot of photos with Lia, so my XML file is going to already have her set up with hair, clothes, accessories, etc. Object Spooner > Manage Entity Database > Freemode Female > Ped Options > Wardrobe > Outfits > Your character > Apply Now, you're going to watch me scroll through my clothing options. I just did something quick for the purpose of the video, but I encourage going into each of your components and just exploring what looks best on your character. Like, I said before I already have a lot of things pre-saved for Lia, so her nails, accessories, and all of that are already on her model. Next, is picking out the animation. I was trying to go for a pose that could place Lia near her cat and maybe lean up against the cat tree. Object Spooner > Manage Entity Database > Freemode Female > Ped Options > Animations I scroll through the poses for a bit of time, trying to see what I like best. Once I have settled on something that I like, I'll move on to position Lia a little closer to the cat tree itself. Object Spooner > Manage Entity Database > Freemode Female > Manual Placement Kind of just play around with the options there until I find what seems suitable. Sometimes I will turn off the Collision and Gravity, because it makes it easier to place the ped. If you don't turn off those options they'll end up just bumping into your furniture and won't ever really mesh into it. Object Spooner > Manage Entity Database > Freemode Female > Gravity (turn red) > Collision (turn red) Her position is as good as I think I'm going to make it, so I'll spawn in a phone for her to hold now, since this is a selfie pose. I have all of my phones that I've downloaded favorited, so I can easily access them, I just suggest doing that as well when you find the item. Object Spooner > Spawn Entity Into World > Object > Favourites I'm just going to do the same step, I did firstly when placing Lia by attaching the phone object to my Franklin character. I'll move the item a bit closer to Lia, so it's easier for me to manually place it after. Object Spooner > Manage Entity Database > Phone Object > Attachment Options > Attach To Something > Self Once the phone is close enough for my liking and the camera is positioned to face outward, I'll just manually place the rest for it to be positioned into her hand. Like before just kind of play around with this till it looks correct. Object Spooner > Manage Entity Database > Phone Object > Manual Placement Lia is all set for the photo now! You MUST record this in third person with F1, or once you go into Rockstar Editor, it won't work. Before your record, I'd highly suggest messing with the Weather Options and setting it to clear, so there is not smog/fog/rain. And, going into the Time Options. The time 6 is great for a golden hour. Turn Pause Clock Time to green as well to avoid time change during recording. I, personally for Lia's vibe like to do night time photos and add a work light to brighten it up, so you're going to see me set the Time Options to 2. Then, I'm going to spawn in a work light for the photo. Object Spooner > Spawn Entity Into World > Object > prop_worklight_01a Then, like the other items. I am going to attach it to Franklin, positioning it a bit closer for easy help. Object Spooner > Manage Entity Database > prop_worklight_01a > Attachment Options > Attach To Something > Self And, after I am going to go into manual placement and just position it, so hopefully no weird shadows show and her whole body is lightened nicely. Object Spooner > Manage Entity Database > prop_worklight_01a > Manual Placement F1 record in third person, then before I jump into Rockstar Editor this step is critical. DELETE everything, otherwise you are going to end up with double ped's in rockstar editor and there is no way to fix it. Object Spooner > Mange Entity Database > Removal > Delete All Entities in Database Finally, we can go into Rockstar Editor to snag my picture! If you've ever used /editor in game, rockstar editor is quite similar. You really just need to play around with the photo until you think it's in a good area to snap a screenshot. I will drag the video time around, until I find a good spot where I feel like she is looking down at the camera and it seems like she is really taking a mirror selfie. Then, I'll turn the camera horizontal and just position to snap several photos from there. I use the F12 screenshots for my menyoo photos to go to my steam directory. After that I personally just use PicsArt editor on my iPhone and will edit my photos in there. I know a lot of people like to use photoshop and Honey's youtube tutorial does a great job of showing how to edit your menyoo photos in photoshop. Here is my before & after photo of Lia, I decided the cat was too much of an odd angle to include, unfortunately: I truly hope that this tutorial was helpful. I had many questions and A LOT of confusion when I first started menyoo, and I'm still learning. I was attempting to cover a lot of the basic that I felt left me confused/seeking further explanation. Special thanks to some of my amazing friends who taught me what I know! @Fireworks @honkstars @Hypnotic @Mattel
- 19 replies
-
- 23
-

-

-

-
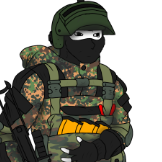
Hello. I got bored and wanted to play with hesco blocks. So... I did. This is the result, feel free to use it for your Menyoo stuff/stolen valor/operations/whatever. I figured I'd share since even though it's not the best, it's definitely better than nothing, I guess! The download is under the images. Install path: D:\Steam\steamapps\common\Grand Theft Auto V\menyooStuff\Spooner Simply make a new .xml file and paste this inside. Pastebin Link Or download the file, attached to the thread! Access: Open Menyoo (F8 by default), Object Spooner, Manage Save Files, FOB. Have fun! FOB.xml
- 7 replies
-
- 10
-
-
-
- fob
- menyoo operators
- (and 1 more)
-
I suggest adding an angle rotatable freecam. You could give access to cool pictures for all without them having to install menyoo UNCONDITIONALLY. If you are afraid that this will be abused, you could implement a limitation in the radius of perhaps 15-20 meters to move around in the said freecam. Relevant cmds: I don't know. Maybe F6 or /freecam How will it benefit the server?: It adds the possibility to take part in the social media game for people who can't mod their GTA, without being laughed at, because they just press F8. It barely has any cons, if it gets regulated. Edit: Along with informing all nearby players, once it got toggled. This kills the ability, to abuse it, as a cheat.
-
MASS MODS FILE RENAMER [Menyoo] CREDITS: @St3fan[NL] Welcome to my first guide on how to mass rename your mods for Menyoo! We all know the long process of renaming each and every file to fit in our OpenIV, finding the correct number and sometimes renaming over 20+ files just for a single mod. This little program should make your life much easier from now on! There are also programs such as Advanced Renamer, but this is easier to use. Step 1: Getting the right programs! First thing is, of course, download the right programs. There are two programs we need: MASS FILE RENAMER - This is the source code of our program. The link is safe and tested (personally.) WAMP - The heart of the code. Due to the PHP limitation, we will need a ''server'' to use this program. Once you have all of those in a download folder, proceed to the next step! Close GTA if you have it open... you don't want that open at this point. Step 2: Installing the program To make it easier for everyone about how to install and use the program, I've prepared two separate videos about it. ATTENTION! DON'T USE IT TO MODIFY THE MODEL. (future update) And that's it! Thank you for reading this and have a nice day! Credits : @St3fan[NL] (Coding) / @Levitate (Tutorial)
-
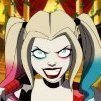
Hey everyone! This is a direct successor of my old thread HERE that was based around Kayleigh. Kayleigh is no longer among us (not dead just back at family), so meet Nikki! I'll keep this thread updated to show as I learn my way around in menyoo. Feedback is greatly appreciated! 🙂 I also see Nikki as a new start. New year new me I guess!
-
hey im mfinda aka erp. (when ppl say theyre gonna erp theyre talking about me) i do alot of work in photoshop. in fact i have a character whos entire career revolves around working in it, alyx rodriguez. on her i run a business, ALYX Digital, that sells graphic design, photography, etc. when people dont want their logos to look like booboo, or they want their business card to instantly grant them erp perms when they /shownote, people come to me. however im showing none of that in this thread, because even if the idea is interesting to me, a thread full of logos is fuckin boring so, alyx is also the creative director for elegance, as well as a model for it. when i have an idea for a photoshoot, a photo for facebrowser, for elegance, or whatever, most of the time my ideas are outside the range of what mods or just in-game assets can provide. so, i use my experience with photoshop to complete these ideas. im not a professional or anything, im actually a baker irl but yeah man heres my works! ill show you the befores and afters of each edit, and a bit on how i did it. thank u for looking!
- 37 replies
-
- 15
-
-
-
Hey there! So I always wondered something. We can download our character from the UCP, which gives us a .XML file for use in Menyoo. If we can download it, why not also get the option to upload it? People could create/modify their characters in Menyoo and then upload it via an upload option at the same spot as the download option! 🙂 Now, I know the plastic surgery costs money ingame. So this suggestions also includes that you are charged the exact same fee each time you upload a .XML file at the character screen on the UCP. The option would be unavailable untill you actually spawned in with a character. Good idea? Bad idea? Sounds like a good addition to me with little work needed 🙂
-
HIRING A VIDEO EDITOR. HIGH PAID POSITION. > APPLY NOW < (( Must be competent with Menyoo/Rockstar Editor )))
-
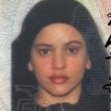
High-quality character images [Menyoo] A guide by @honey. / @jessica SUPPORT DISCORD: https://discord.gg/Menyoo 2800+ members! Hiya! Welcome to my first guide based on how to get high-quality character images! This can be a long process at the start however once you get a hang of it, it should be perfectly easy and quick to do! If you don't know what "images" I'm talking about.. here are some examples! . Step 1: Getting the right programs! (They're hyperlinked! Click on 'em!) The first step to all this, of course, is getting the programs you need! These are all very simple to get and you need to create a folder in your downloads and download all the following additions! (They are all safe, personally tested!) Menyoo - This is the main thing we will be using to make them look extra spicy, it's a single-player trainer mod. If you don't know what that is, it basically makes you admin of single-player and gives you access to everything on the game that you could possibly want. (Animations!) Scripthook - Menyoo can't work alone, they need Scripthook's help! OpenIV - This is what we are going to use later on to add stuff that we want which isn't in-game, you need this to make sure everything you're doing is safe and away from your main game! (I'll explain how!) Once you have all of those in a download folder, proceed to the next step! Close GTA if you have it open... you don't want that open at this point. Step 2: Preparing your Scripthook and Menyoo Now that you have the programs, it's time to get them set up. Locate your GTA5 Your GTA5 is, if using Steam, within your Steam folder. If you don't use Steam then I'm sure you'll know how to find it and if you do use Steam and saved it in a funky place, you must know what you're doing. For me, my GTA5 is in the following path. (Follow it) C:\Program Files (x86)\Steam\steamapps\common\Grand Theft Auto V Open the Scripthook Zip When you open the zip you are going to see the following 3 things: Open the "bin" folder Move everything inside of the bin folder to your GTA5 main folder. Open the Menyoo Zip When you open the zip you are going to see the following 4 things: Move only the "menyooStuff" and "Menyoo.asi" in to your GTA5 main folder. (If you are unable to do this, you need to right click the rar folder in your downloads, go to properties and unsure that it has a tick by unblocked! Credit to @Law) Perfect! Now you have what we're going to use to customize your screenshots (Menyoo) and what we need to run it, (Scripthook). Step 3: Preparing OpenIV This one is a bit more tricky and isn't easy on the eyes so make sure you're following each step appropriately. Open "ovisetup.exe" What you're opening right now is what we will use later to ensure our GTA5 is safe for any mods that are put in, this is your safety net. Follow the instructions As OpenIV installs, it will be giving you confirmations and what not, it's all good. If it says "Do you want to make a mods folder?" at any point, say YES! It may not happen until later but keep it in mind until then! Run OpenIV Now you have OpenIV, it is going to look very daunting but don't worry, you won't need to mess with it for long if you don't want to. Step 4: OpenIV Now that we have OpenIV, this is our first step in taking amazing screenshots, we are going to go through the ASI Manager and enhance our experience. Go to the "Tools" tab Go to the "ASI Manager" option Install all of the available options Step 5: Testing! We've added everything we need to to begin testing! Now here is what you need to do: Open GTA5 Go in to "Story Mode" (It will load really slow if you're not tabbed in to the game) Click "F8" twice This should bring up the Menyoo menu top left of your screen! Step 6: Getting your character Making your character in Menyoo is going to be a task and you really need to stick with it. Getting your character's attribute values You need these so the character you take photographs of actually looks like your character in-game. Here is how to get them: Go to your UCP Go to "Characters" Select the character you want to use Just under the name on the left side should be a drop-down "Face Attributes" Take a screenshot or leave the tab open. Getting your base character You now need to make that same base character within your single-player world. Open the Menyoo menu (F8) Go to Player Options → Model Changer → Multiplayer Models Go through the options and select "Freemode Female" or "Freemode Male" Be surprised by how funky your random model looks like. Go to Player Options → Wardrobe → Default Components Now go to Player Options → Wardrobe → Outfits → Save Outfit To File → Name it whatever you want! Applying your face attributes It's finally time to start sculpting your character! Go to Player Options → Wardrobe → Head Features Adjust all appropriate sections to fit your character Or you can reference this guide for an EASY QUICK convertor: The attributes are different You will notice that the attribute names are slightly different however they do change the same thing. On GTA:W there are some options that are not yet accessible so always make sure you are converting a character from GTA:W over to Menyoo because it will not work the other way around, they'll look too different. This stage will take some time to perfect but once again, it's all worth it. Saving the outfit Remember to keep saving your outfit, do not use "Apply outfit" when saying but instead "Overwrite file" on your selected outfit. Remember that if your character is in an animation when you save the outfit, it will bug and not work so make sure you're not in one. Step 7: Getting your pictures! Now that you have your lovely character in game, it's time to start fiddling around with other settings to get the perfect picture! Options Weather Options - Change what kind of atmosphere your picture will have as well as the weather. Time Options - You have free reign over the time of where this picture will take place, if you want it to not move, you can pause the time! Object Spooner - If you want to have a more custom backdrop, use items and you can even make other people too! Animations (Cannot be used with Snapmatic) These are going to play a huge part in what your screenshots will look like, so how do you use them? Player Options → Animations (→ All Animations → Search) Capturing the moment Now it's time to either Snapmatic it or Rockstar Editor! Snapmatic Snapmatic is basically just the camera app on your characters phone. You can access the phone but clicking the UP arrow key and then guiding it to the Snapmatic app. All of the pointers and directions are given to you on that app! It's basically like your character taking a selfie, a very simple and easy feature. A word of advice: Do not left click to take pictures, they come out looking horrible! Instead, hide the grid with G and just taking a regular Steam screenshot or a screenshot with whatever program you use! Rockstar Editor To use Rockstar Editor, once you have yourself set up in the position you want to capture, you need to click "F1". This is Rockstar recording by default so unless you've changed it, it will work. Leave it to record for about 10 seconds and DO NOT tab out! Once you feel that you have sufficient footage, you can click "F1" again and it will stop recording. It's now time to edit it! Step 8: Rockstar Editor (Skip to step 9 if you used Snapmatic) Now we have our recording, we need to fiddle with it and adjust it to capture the exact picture you're after. Open the map and go all the way right in the black tabs and select "Rockstar Editor" Create a New Project Add New Clip - say yes to everything after this. Camera When you have the option to enter the "Cameras" tab, you are more often than not going to select the "Free Camera" option. This, combined without OpenIV plugin allows us to do so much with the camera! You can zoom in and out as well as tilt it! "Remember that you can enable the free camera in Menyoo and toggle it using F3 - it's another way to go when it comes to taking screenshots." (Credit to @hentai!) Depth of Field If you're not sure of what this is, this basically is what you want the camera to focus on in your image. Normally I set this to my own custom one however the default one works really well! Effects These are just your filters and general effects, saturation, contrast, brightness and vignette. It is entirely up to you if you want to use this however normally I add what I want afterwards. From this point in Rockstar Editor, it's all about exploring! There are no limits for what you want to do, within reason, and this is entirely up to you! Make your pictures unique, funky places, whatever you want! Click "H" to hide the overlay and click "F12" to take your screenshots! Step 9: Editing your pictures Everyone is going to have a different way that they want to edit their photos when it comes to how they look. It's also important to keep an eye on clothing clipping as well as just general maintenance for your character. Colour correction Makeup enhancement Skin correction Shape correction Shadow correction Clipping correction Expression adjustments Adding in logos or other third-party items I use Photoshop to edit my images as well as the ones I do for others if you ever have any questions regarding this feel free to reach out to me and I'll either sort it for you or teach you how to do it yourself! Step 9.1: Photoshop This is actually another guide made by @xanx but it is completely worth the read! The guide got removed 😞 Thank you for tuning in! I hope that this at least helped you and if not, let me know what would make it easier to understand or follow! I haven't gone into detail about how to add mods or how to edit the photos but if that is something that you'd like, just let me know. If you have any questions about this, feel free to drop a comment and or tag me and I'll answer it as soon as I can! Please avoid Forums PMs as answering questions on this thread may help someone in the future!
- 214 replies
-
- 51
-
-
-